Set up Flutter using VS Code
This guide was tested for Windows only.
Prerequisites
- Visual Studio Code 1.86 or later
- Git for Windows 2.27 or later to manage source code.
For more details, visit Flutter documentation.
Step 1: Install Flutter extension on VSCode
Step 2: Prompt VSCode to install Flutter
-
In VS Code, open the Command Palette by pressing
Control + Shift + P. -
In the Command Palette, type
flutter. -
Select
Flutter: New Project. -
VS Code prompts you to locate the Flutter SDK on your computer.
- If Git is set up, it will ask you to pick a folder to Clone Flutter
warningDon't use a directory that meets one or both of the following conditions:
-
The path contains special characters or spaces.
-
The path requires elevated privileges.
As an example,
C:\Program Filesfails both conditions.-
If you have the Flutter SDK installed, click Locate SDK.
-
If you do not have the Flutter SDK installed, click Download SDK.
noteThis option sends you the Flutter install page if you have not installed Git for Windows as directed in the development tools prerequisites.
When prompted Which Flutter template?, ignore it by pressing Esc.
Step 3: Add Flutter SDK to PATH
When the Flutter install succeeds, VS Code displays this pop-up notification:
Do you want to add the Flutter SDK to PATH so it's accessible in external terminals?
- Click
Add SDK to PATH.
When successful, a notification displays:
The Flutter SDK was added to your PATH
Try flutter --version to check if it's successfully installed yet.
Troubleshooting
If it does not work, add the path mannually.
- Copy your path to directory
Flutter SDK\flutter\bin - Open
Edit the system environment variablesand do the following steps: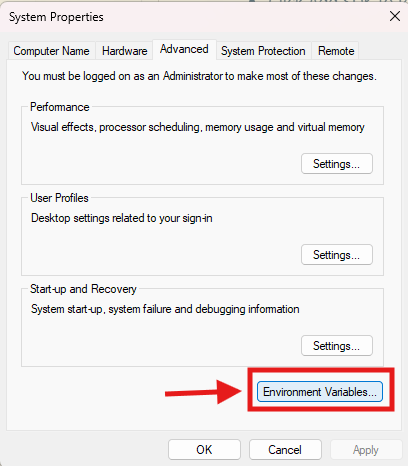
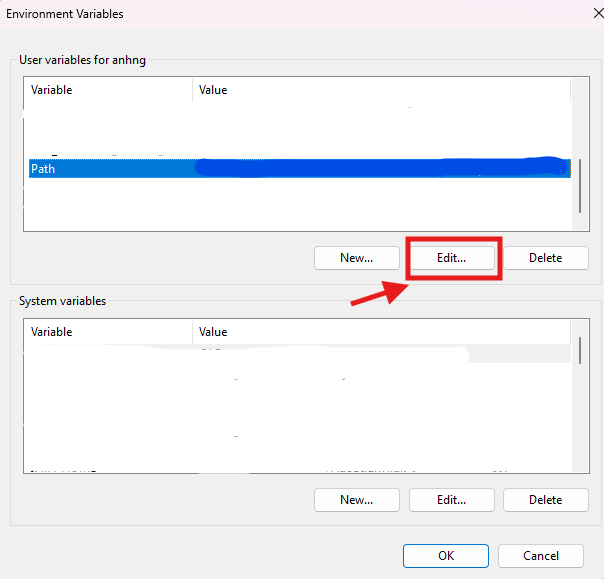
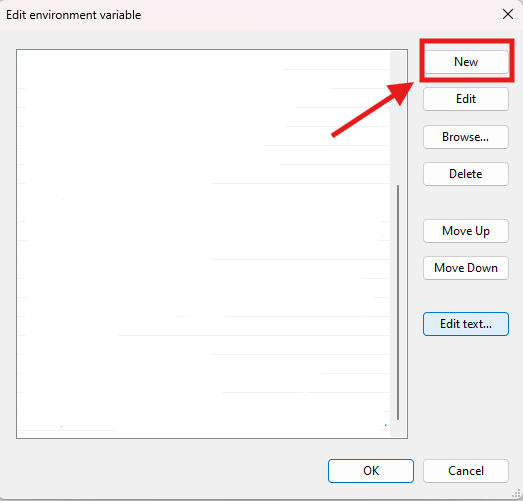
- Paste the copied path then click
OK.
To verify if you successfully installed FlutterSDK, run command:
flutter --version
Step 4: Create your first app
In a designated folder, run this command:
flutter create <app_name>