How to run Android emulator with Flutter in VS Code
Step 1: Install Android Studio
After installation is complete, check the last lines of the log. If the hypervisor driver fails to install, you may see something like:
Android SDK is up to date.
Running Android Emulator hypervisor driver installer
[SC] ControlService FAILED 1062:

The service has not been started.
In this case, refer to the fix here.
Step 2: Create a Virtual Device
- Create an empty application in Android Studio
- Open
Device Managerand click the+button to create a new virtual device.
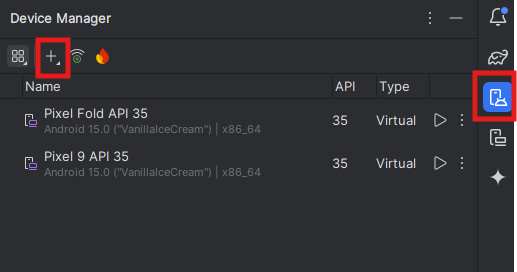
- Select a device and install the desired Android version, then click
Finish. Once the device is created, it will appear in Device Manager. Click the play button to launch the emulator.
note
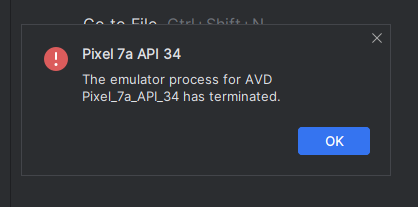
If you see the following error, check out my blog!
Step 3: Run the Emulator in VSCode
- Leave the emulator running in Android Studio.
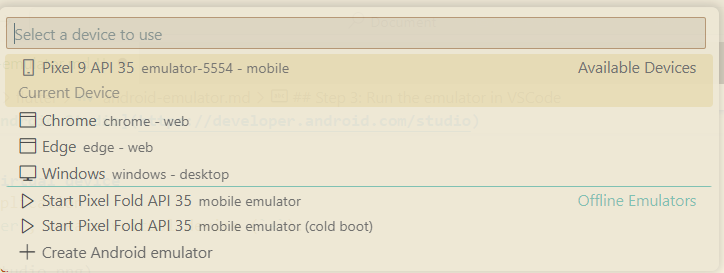
- Open your Flutter project in VSCode and click the device selector at the bottom right.

- Open your Flutter project in VSCode and click the device selector at the bottom right.
Troubleshooting
Issue with Running Emulator in VSCode
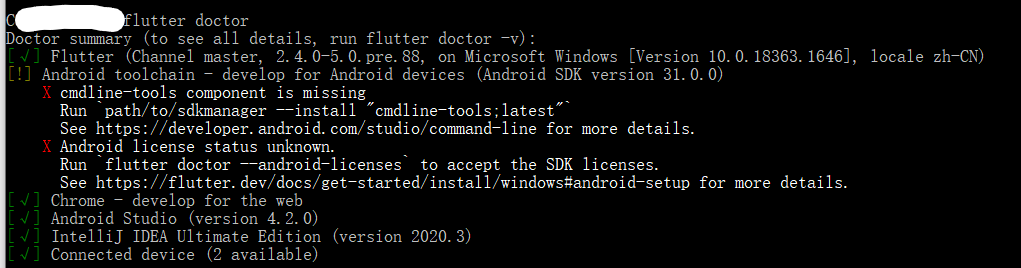
Run the following command in the terminal:
flutter doctor
If there are issues with the Android toolchain, you might see an error message like this:
Fixing Missing cmdline-tools
- Open
Android Studio > Tools > SDK Manager > SDK Tools, then check Android SDK Command-line Tools (latest)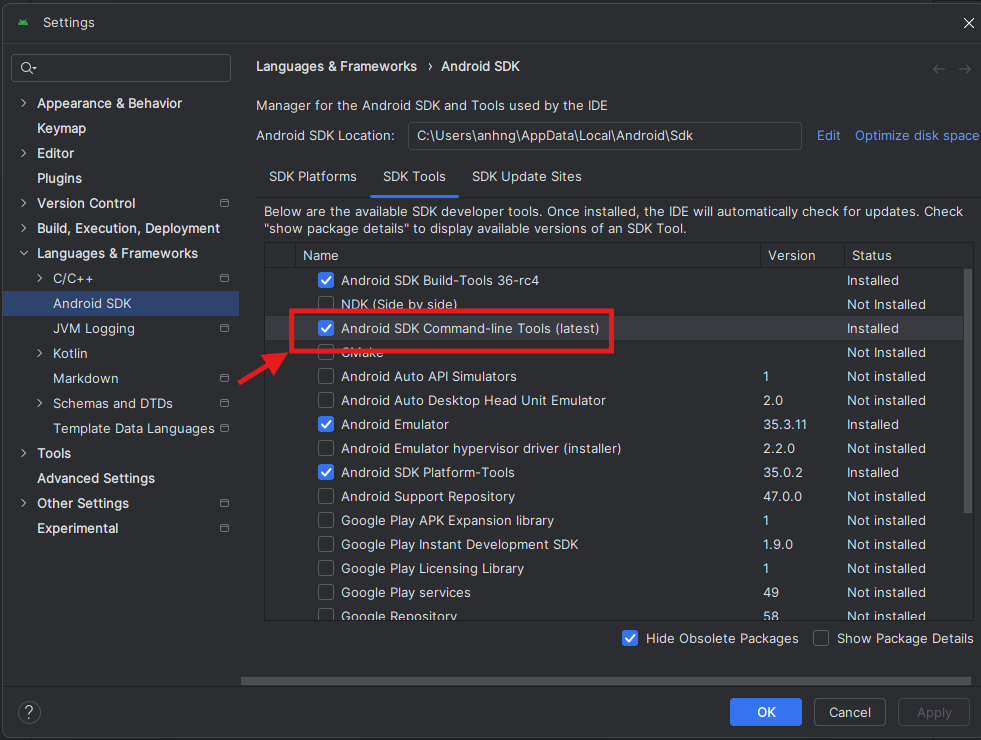
Fixing Android License Status Unknow
- In the terminal, run the following command to show all Android licenses:
flutter doctor --android-licenses
Accept all terms and conditions when prompted.
Issue with Running a Virtual Device in Android Studio
- If you see the message "The emulator process for AVD xxx has terminated" while trying to run a virtual device, check out my blog for troubleshooting tips on how I debug and fix this issue!