Dependency Injection
Understanding DI
When a dependency is requested, the injector checks its registry to see if there is an instance already available there. If not, a new instance is created and stored in the registry. Besides classes, you can also use other values such as Boolean, string, date, and objects as dependencies.
Check out Angular documentation or this article for in depth explanation
Pros
- Loose coupling
- Reusability
- Testability
- Singleton
- Lifecycle management
- Lazy loading
Cons
- Learning curve
- Hidden dependency - magic
- Over-engineering for simple application
- Circular dependencies: >2 services depend on each other
- Performance: although DI is generally optimized, resolving dependencies at runtime can introduce some overhead.
Injector Layers
Whenever a dependency is requested, injector will look through the injector tree.
- Null injector: return
Nullif cannot find any dependency in the registry before this layer. - Plaform injector: return dependency of the plaform that the app runs
- Root injector: return dependency providedIn root
- Component injector
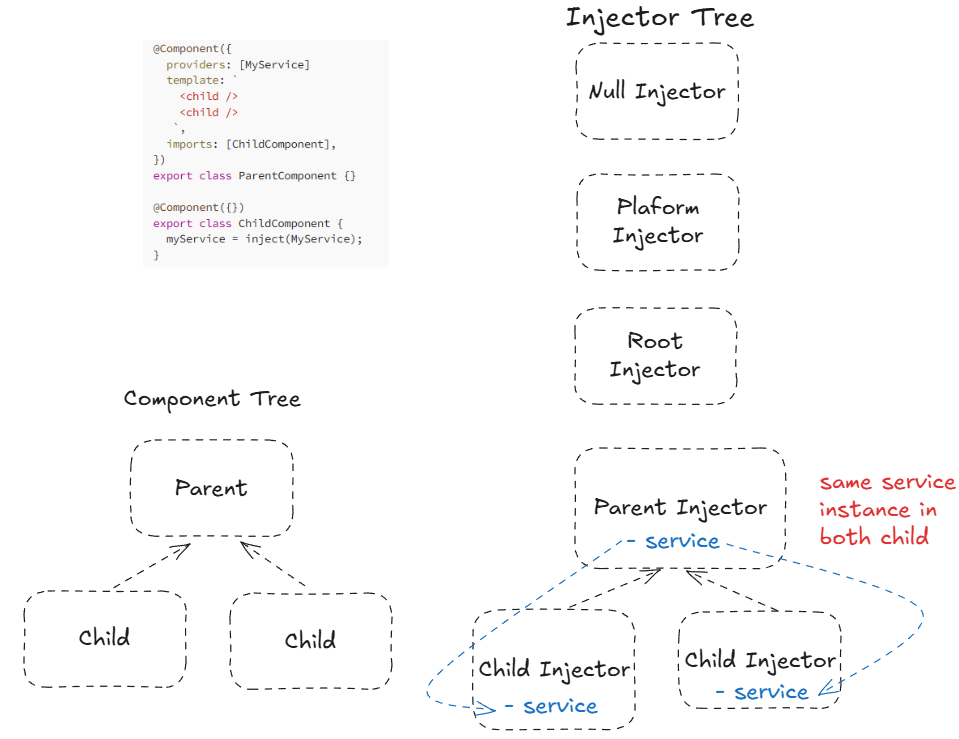
Example 1
Since ParentComponent and ChildComponent are annotated with @Component, it means they are injectable. Thus, each component is stored within its own NodeInjector.
In this example, MyService dependency is created in ParentComponent.
For the first child, it goes up looking for a dependency in the injector tree. Once it reaches Parent Injector, injector creates an instance of MyService, stores in the registry and injects to myService var in the first ChildComponent.
The injection for the second child also stops at Parent Injector and injects the stored instance to MyService in child 2. Thus, both ChildComponent share same instance.
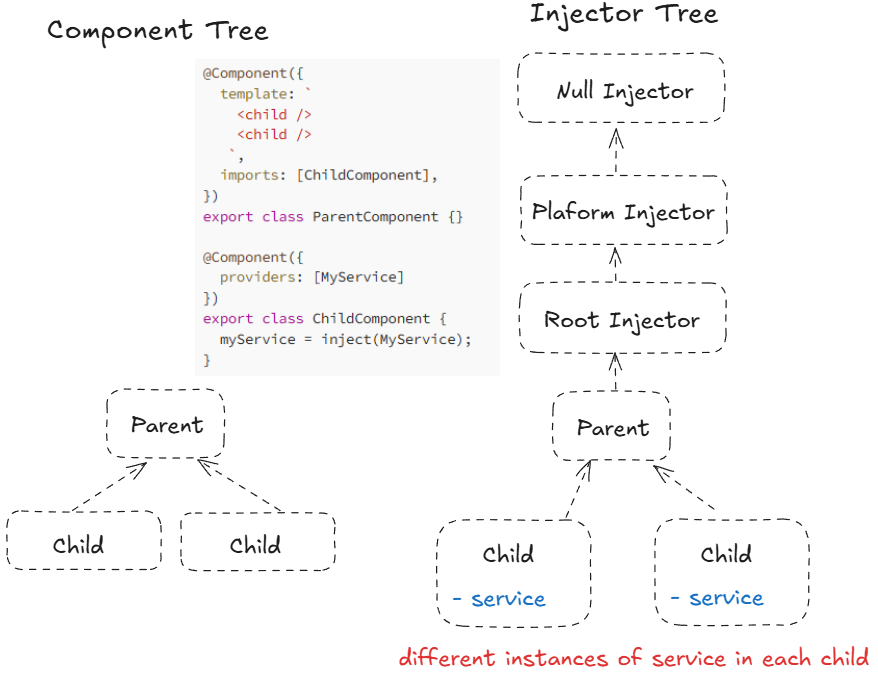
Example 2
In this example, MyService is added to injector tree at ChildComponent. Thus, the first child finds the injector right at its component level. Similarly, the second child also has its own injector. Thus, each child has its own instance of the dependency.
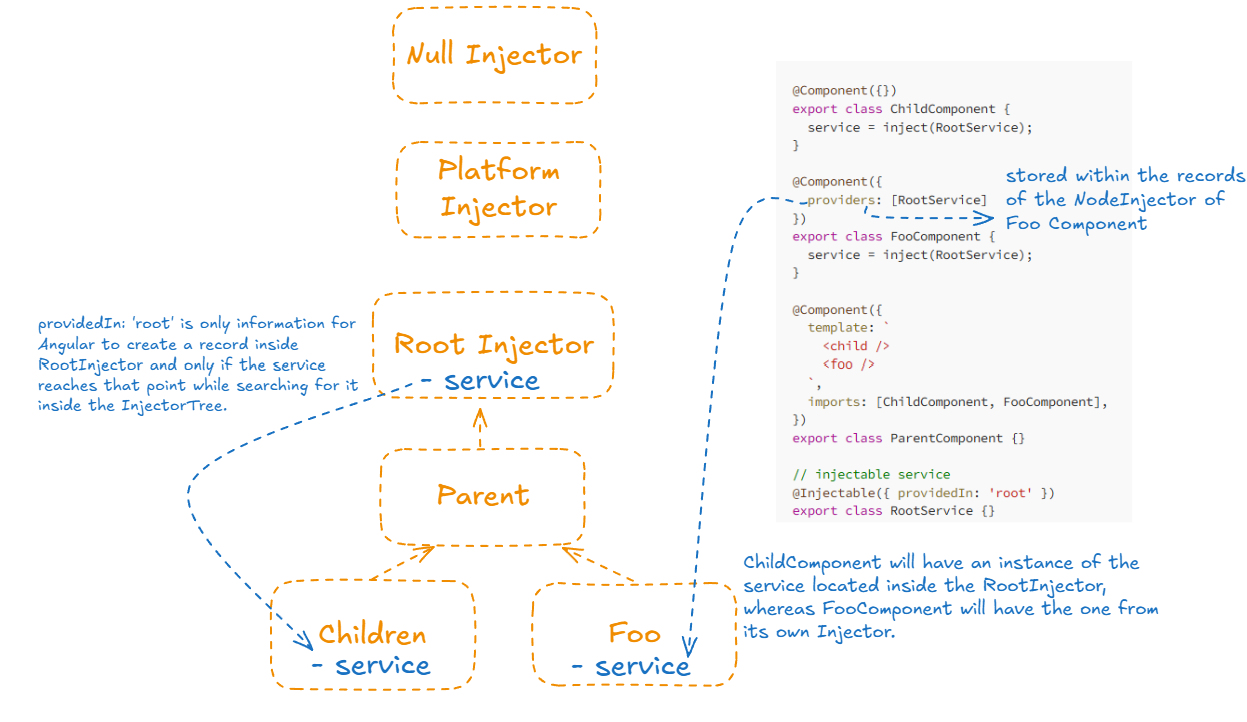
Example 3
ChildComponent will have an instance of MyService located inside the RootInjector, whereas FooComponent will have the one from its own injector.
Providing Dependency
1. Application Level
@Injectable({ providedIn: 'root' })
export class ExampleService {}
- Any component that injects
ExampleServicewill get the same instance. - No need to manually add this service to the
providersarray inapp.module.tsor any feature module. Angular automatically registers it in the root injector. - Tree-shaking: if this service isn't used, Angular will optimize the app by removing it from the compiled application.
2. Component level
@Component({
  providers: [MyService]
})

export class AComponent{}
Configuring dependency providers
Angular provides four tokens for configuring how dependencies are injected:
useClass- instantiate a provided class when a dependency is injecteduseExisting- aliases a token to reference an existing one.useFactory- define a factory function that constructs a dependency.useValue- provides a static value to be used as a dependency.
By default, this is useClass. The following two configurations are equivalent:
providers: [Logger]

providers: [{provide: Logger, useClass: Logger}]
For more info, check out the Angular documentation
Injecting a dependency
The most common way to inject a dependency is to declare it in the class constructor.
@Component({ … })
class AComponent {
  constructor(private service: ExampleService) {}
}
Here, the constructor() specifies ExampleService type and stores its instance in a private field called service.
Creating an injectable service
To generate a service, use the following command:
ng generate service examples/example